
Bikes Blog
Learn how to alter bike gears | Index your gears and repair shifting issues
Mar
Once you change gears in your bike, the shifter pulls a set quantity of cable, which in flip strikes the entrance or rear derailleur a predetermined distance. This strikes your chain onto a distinct sprocket on the cassette or chainring.
Gear cables can stretch over time and derailleurs might be knocked out of alignment. In case you discover your chain is skipping a gear or that your shifting is getting caught, then there’s a very good likelihood it is advisable to alter your gears.
That is often known as indexing your gears.
If the gears in your bike are listed correctly, every single click on of the shifter will trigger a single shift up or down the gears, entrance or rear.
On this step-by-step information, we clarify how you can index your entrance and rear derailleurs by adjusting cable pressure.
We additionally define how you can set the restrict screws in your drivetrain. That is helpful if you’re organising a brand new entrance or rear derailleur from scratch.
In case you’re unsure the place to start out, soar to our information on how you can diagnose and repair frequent shifting issues along with your bike gears on the finish of this text.
A silent and smooth-running drivetrain could make all of the distinction to your journey and fixing your bike’s gears is one thing that even probably the most mechanically inexperienced can deal with.
Learn how to index the gears in your bike
Earlier than we get caught in, we suggest you examine the situation of a few of your drivetrain elements to keep away from any frustrations afterward.
First, examine {that a} bent derailleur hanger isn’t in charge to your shifting woes (examine our step-by-step information on how you can diagnose and straighten a bent hanger for more information).

It’s crucial the cables are in good situation. The cable ends shouldn’t be frayed and the outer housing shouldn’t have any cracks or splits. In any case, it’s greatest to interchange them annually or so.
It’s additionally value ensuring the derailleur mounting bolts, crankset and cassette are fixed to the producer’s beneficial torque.
You must also examine the situation of the derailleurs and shifters if they’re outdated. Derailleurs can develop play or slop within the pivots or linkages over time. It’s a good suggestion to carry the derailleur cage and examine if it has extreme lateral motion.

The ratchet contained in the shifter can put on over time too. A imprecise or lifeless shifting really feel is usually symptomatic of this.
Some shifters, akin to many Campagnolo choices, might be serviced, whereas the ratchet mechanism in Shimano shifters is the equal of a Swiss watch and as a substitute requires substitute.
If that is so, you’ll want to interchange these elements.
In case you’re organising a brand new derailleur, you’ll must set the restrict screws and B-gap adjustment earlier than indexing the gears. You possibly can learn how in the direction of the tip of this information.
What it is advisable to index your gears
- A hex key to suit your derailleur cable retention bolt, normally a measurement 4mm or 5mm
- A torque wrench and socket to torque the cable retention bolt (non-obligatory however beneficial)
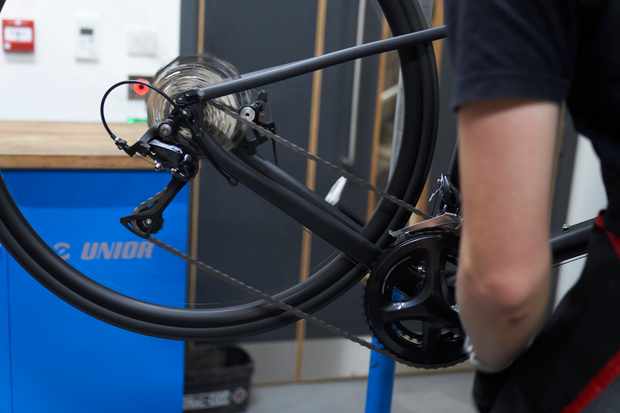
Learn how to index a rear derailleur
Step 1

Shift the rear derailleur into the smallest cog.
Rigorously and slowly transfer the rear derailleur manually whereas pedalling to verify the chain doesn’t drop off both finish of the cassette. If it does, you’ll must examine the hanger alignment and the restrict screws.
In case your drivetrain contains a entrance derailleur, shift it into the center or smallest chainring.
Step 2

Wind the barrel adjuster in totally clockwise, then out by one flip.
A barrel adjuster is a mechanism that makes small modifications to the cable pressure by successfully growing or reducing the size of the gear outer.

It’s normally positioned on the again of the derailleur or on the shifter. Some highway bikes have in-line adjusters, that are built-in within the cable housing.
Step 3
Launch the cable mounting bolt on the again of the derailleur.
Step 4

With the chain within the smallest cog, pull the shifter cable taut and re-tighten the retention bolt to spec.
Step 5
Pedal gently and press as soon as on the shifter to shift the chain onto the second smallest cog.
If the chain didn’t shift to the second gear, you’ll want to extend the cable pressure by turning the barrel adjuster counter-clockwise.
Preserve turning the cranks and improve the cable pressure till it shifts into gear.

In case you’ve needed to wind the barrel adjuster out quite a bit, it’s value undoing the cable mounting bolt, pulling extra cable via and beginning once more. In case you go away the barrel adjuster as it’s, it gained’t go away a lot room for future changes.
If the chain shifted easily into the second gear and there’s no extreme noise, that’s a very good signal.

If the chain over-shifts, scale back the cable pressure by turning your barrel adjuster clockwise till the chain runs easily within the second smallest cog.
As a normal rule, it’s beneficial to solely wind the barrel adjuster in or out by 1 / 4 flip every time earlier than re-checking for the very best outcome.
Step 6
You’ll now wish to examine the chain shifts again all the way down to the smallest cog easily.
If the downshift is hesitant, lower the cable pressure in small increments.
Step 7

Now repeat this course of for the third cog on the cassette.
When you’ve received the primary three gears listed correctly, the indexing will doubtless be superb for the remainder of the cassette. Now you can examine the indexing of the remainder of the gears, growing or reducing cable pressure in minute increments as required.
Use the barrel adjuster, both on the derailleur or shifter.
In case you’re discovering the downshifting is usually responsive, however upshifting isn’t, there’s a excessive likelihood the issue is soiled inside cables or housing, wherein case you need to attempt lubricating or changing them.
Learn how to index a entrance derailleur
Step 1
Shift your entrance derailleur to the smallest ring and your rear derailleur right into a cog close to the center of the cassette.
Slacken the entrance derailleur cable by winding the barrel adjuster totally clockwise.
The barrel adjuster will both be on the shifter or inline on the cable.
Fashionable Shimano entrance derailleurs combine the cable pressure adjuster into the derailleur physique.
Step 2

Launch the cable retention bolt, take any slack out of the cable after which re-tighten the cable retention bolt. Entrance derailleur cables sometimes require extra pressure than a rear derailleur to function.
Step 3
Try and shift to the center or outer ring. If shifting is hesitant, wind the barrel adjuster one half flip anticlockwise earlier than pedalling once more.
Step 4

Repeat this course of till the chain shifts up easily onto the larger ring. You probably have a 3rd chainring, attempt upshifting to it and add one other half flip if shifting remains to be hesitant.
When you’re joyful along with your upshifting, drop again down via the rings to examine your downshifts.
Some entrance derailleurs have a trim characteristic to cease the chain from rubbing on the outer or inside plates in sure gear combos. It’s value checking this capabilities appropriately throughout indexing.
Setting derailleur restrict screws
Restrict screws management the vary of motion of a derailleur. The restrict screws are normally positioned on the B-knuckle or parallelogram plates.
The screws butt up towards a tab constructed into the parallelogram plates, stopping the derailleur in its tracks.
In the event that they’re not set correctly, your chain could possibly drop off the cassette or chainrings, which might be harmful – for each you and your bike.
What you want

- A small crosshead screwdriver or hex key. Many Shimano derailleurs use a JIS head. A JIS screwdriver is beneficial however not important.
- 4 or 5mm hex key to safe the cable pinch bolt
- A torque wrench and socket to torque the cable retention bolt (non-obligatory however beneficial)
Learn how to set derailleur restrict screws

Though completely different strategies exist, it’s greatest to set the restrict screws with the cable disconnected. It is because cable pressure is taken out of the equation.
Fashionable derailleurs require a hex key to regulate them, though some use a Phillips or crosshead screwdriver. Older Shimano derailleurs use a JIS head for his or her restrict screw however, with due care, you should not have any points utilizing any crosshead screwdriver.
Step 1

Push the derailleur into the most important cog and alter the ‘L’ restrict screw.
We’ll first set the decrease restrict screw on the rear derailleur, which prevents the chain from derailing into the spokes.
Find the decrease restrict screw, which can normally be marked with an ‘L’.
Push on the derailleur to manually shift as much as the best gear potential.
Whereas nonetheless manually urgent on the derailleur, gently flip the cranks and wind out the low cease screw till the cassette shifts to the largest cog and isn’t leaping or clicking.
If the derailleur isn’t new, we suggest another technique.
Set the restrict screw so the chain runs within the second largest cog.
Then, whereas making use of stress to the derailleur, slowly unwind the restrict till the chain jumps onto the largest cog and runs easily.
Doing it this manner means the tolerance of the derailleur’s restrict isn’t skewed in the direction of the improper finish of the size.
Step 2

We’ll now set the excessive restrict screw to stop the chain from shifting off the cassette into the driveside dropout.
Wind out the excessive (H) adjuster and permit the chain to maneuver in the direction of the underside of the cassette by pedalling gently.
Wind within the excessive adjuster till the chain returns to the smallest ring/highest gear and runs easily with out leaping or clicking.

Just like the low restrict screw, we suggest organising a used rear derailleur by first setting the excessive restrict such that the chain runs within the second smallest cog.
Then, wind the screw out slowly till the chain shifts into the smallest cog.
Your rear excessive and low limits ought to now be set.
Step 3

We’ll now alter the B-gap (often known as B-tension, physique angle or ‘dangle-angle’).
With the bike within the highest gear, the higher jockey wheel ought to run simply away from the cassette. Turning clockwise will improve the hole, anti-clockwise will shut it.
Most producers’ derailleurs require a B-gap of between 5 and 6mm. Alter till you’ve got achieved this clearance. You should use a 5 or 6mm hex key as a information.
The B-gap is a very vital adjustment on the newest 11- and 12-speed mountain bike groupsets.

SRAM provides a software that you could line up with the derailleur pulley wheel and the cassette cog that can assist you obtain the proper adjustment.
If you’re adjusting the B-gap on a full-suspension mountain bike, keep in mind you’ll must set this up with the shock below its required sag.
Step 4

We’ll now set the low restrict of the entrance derailleur, which stops the chain from shifting off the smallest chainring.
Once more, it’s value disconnecting the cable or having it in its slackest setting to take cable pressure out of the equation.

Shift the entrance derailleur to the smallest ring and the rear derailleur to the most important cog. Absolutely wind within the entrance derailleur’s low restrict (L) adjustment screw.
Slowly flip the pedals and wind out the screw till the chain returns to the small ring and runs easily, with out rubbing on the derailleur cage.
Step 5

Lastly, we’ll set the excessive restrict of the entrance derailleur, which stops the chain from overshifting off the chainring.
Shift the rear derailleur into the smallest cog.
Manually pull on the cable to encourage the derailleur to shift into the most important chainring.
Preserving stress on the cable, wind out the screw a half flip at a time till the chain jumps to the largest ring. After this, quarter turns will allow you to regulate the derailleur so it doesn’t rub the chain.
Now the entrance derailleur limits are set, chances are you’ll must make changes to the indexing.
Learn how to diagnose frequent drivetrain issues
Drawback: Gears gained’t shift up or down completely with one click on
- Answer: That is mostly attributable to stretched gear cables and you’ll need to re-index your gears
Drawback: Gears are nicely listed however the chain retains dropping off both finish of the cassette or chainrings
Drawback: My rear gears are correctly listed, however the chain shifts too far in a single course
- Answer: If the chain gained’t run to the underside of the cassette and shifts over the massive cog into the spokes (or vice-versa), it feels like a bent rear hanger wants straightening or changing. In case you’ve been in a crash or broken the bike in some way, that is the doubtless trigger. It’s also potential, however much less doubtless, that the restrict screws are inflicting this
Drawback: Downshifting is okay however upshifting is sticky or gradual
- Answer: When had been your cables final changed? Soiled cables and housing could cause gradual or inaccurate shifting